Changing the font and size
You will be familiar with the basic options for changing the font in a cell.

- The font used in the cell
- Font size
- Bold or Italic
- Change the background color of the cell
- Change the text color in the cell
However, other lesser-known options exist, such as double-stroke underlining (after clicking the arrow next to the U).

Or the ability to enlarge or reduce the font size in a cell from the ribbon.

Worked example: what does this icon do?
What is the purpose of this icon?

But there are other options for formatting your text.
- Click on the arrow at the bottom right of the font options.

- This action opens a new dialog box with new options

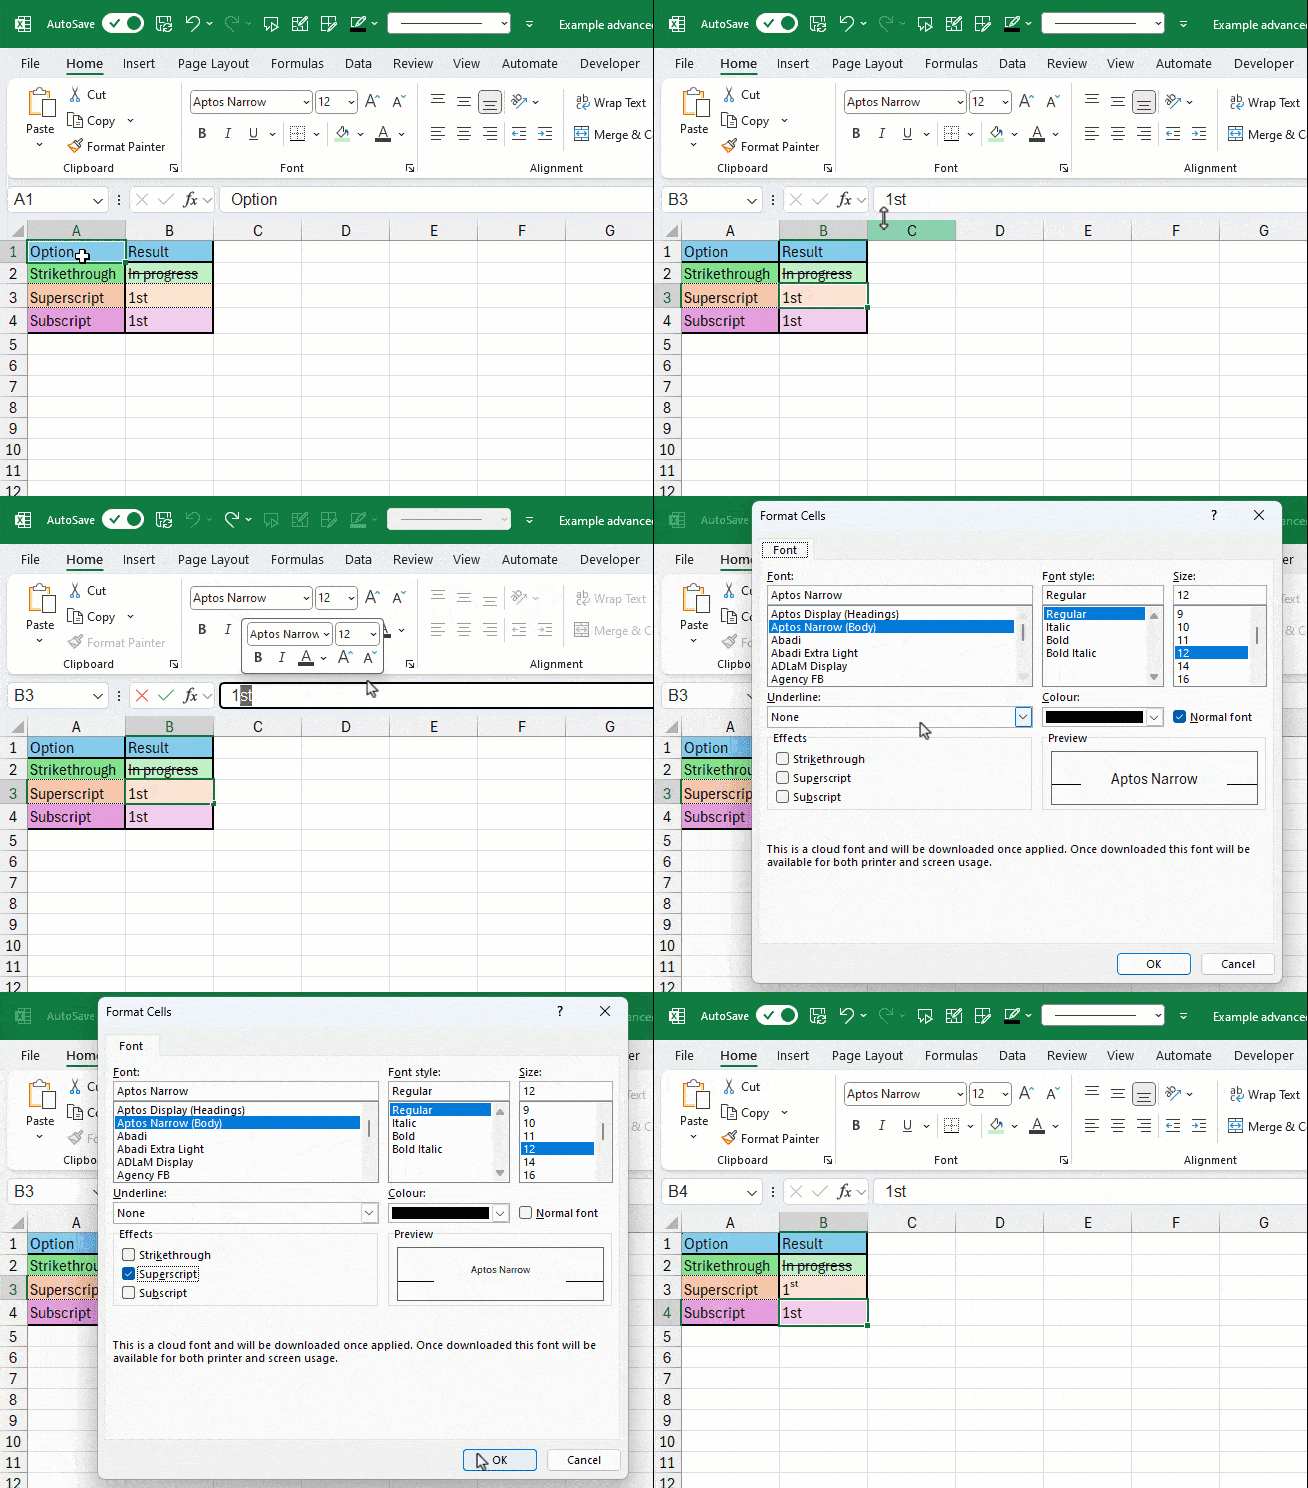
With the Strikethrough, Superscript or Subscript options, you can change your text as follows:

The technique to apply strikethrough, superscript or subscript is as follows:
- Activate the cell with the text you want to apply superscript style
- In the formula bar, select the characters which will have a different format
- Open the Advanced Font Option
- Select the Style option you want to apply
- Press OK to close the dialog box
- Press Enter to validate the result in your formula bar
Aligning the content in a cell
- By default, text in Excel is aligned to the left of a cell, while numbers and dates are aligned to the right.
- This default alignment helps maintain clarity and readability in your spreadsheets, ensuring that data is neatly organized for easy reference and comparison.
- Understanding these basic alignments is key for beginners to manage and present their data in Excel effectively.

But you can change the left, right and center alignment using these icons in the Ribbon:

You can also align the contents of your cells vertically using these other icons.

With the following result in your cells:

Add an indent to cells
Less well-known, you can add an indent to your cells using these icons:
- Reduce indent
- Increase indent

- Adding an indent means moving the text away from the edge of the cell.
- The more you click on the icon, the more the text will be moved.

WARNING: with numbers, you must also indicate that the alignment is to the right.

Worked example: merge and centre in practice
What alignment or indent options have been used in the next cell?

- One option that's used frequently in Excel is the Merge and Centre option.
- This option allows you to position text in the middle of several cells.
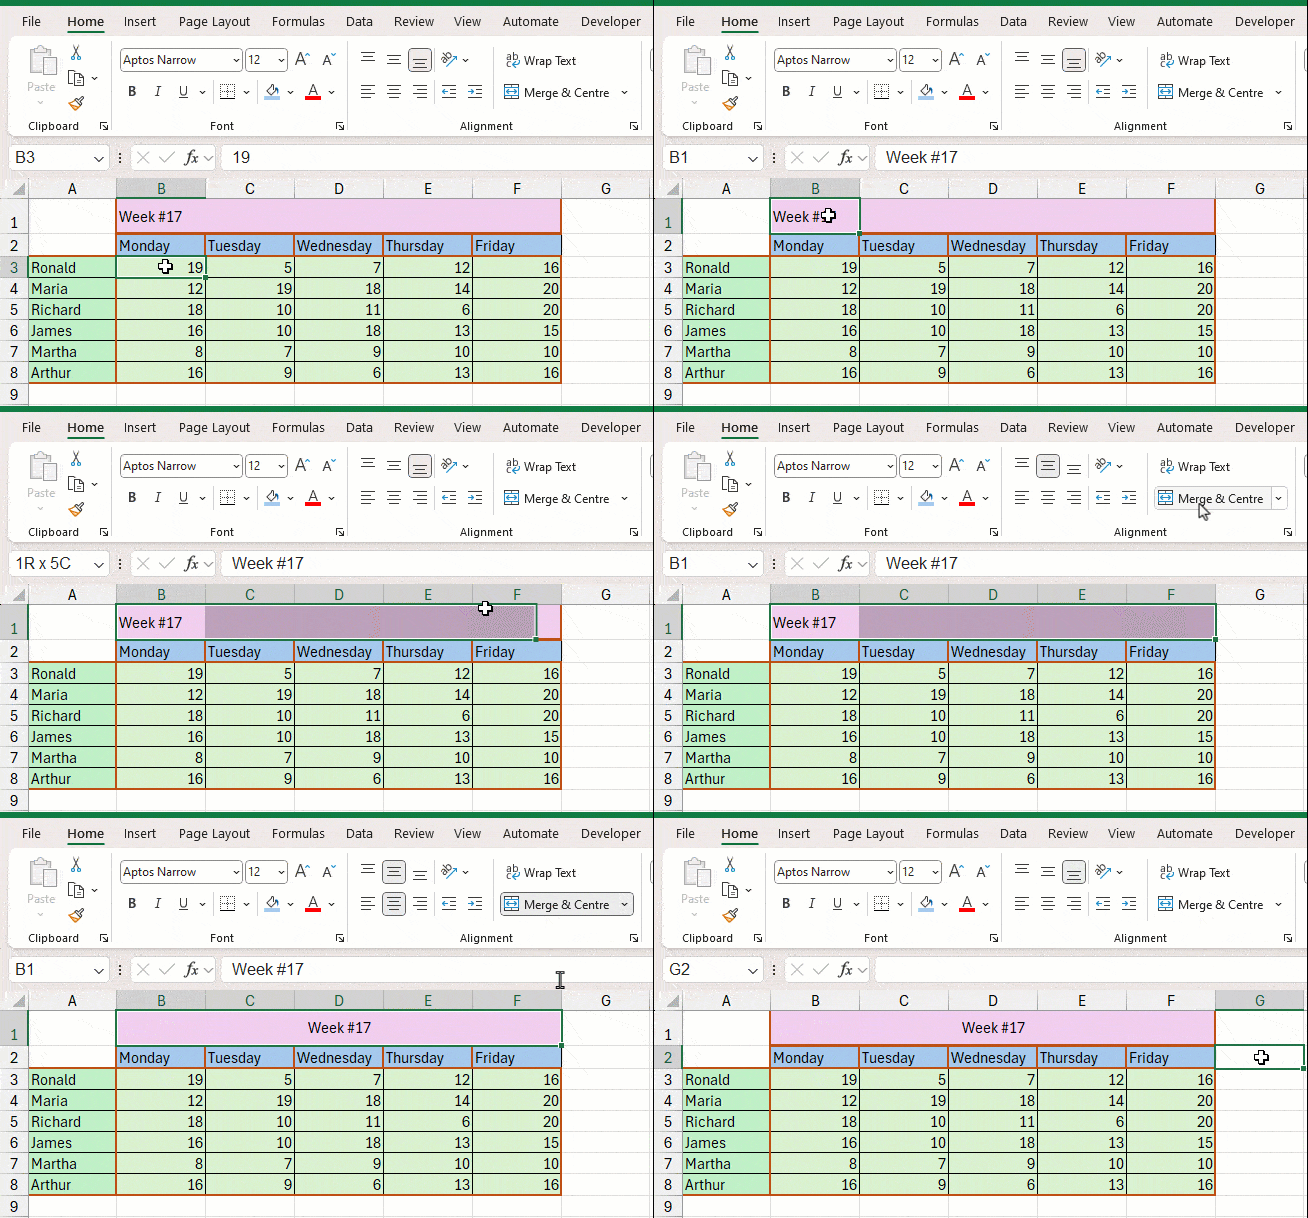
- BUT! Without going into technical considerations at this stage of the training, you should be aware that this method is not very 'clean' for a spreadsheet.
- In fact, some actions, such as copying columns, don't like this technique.
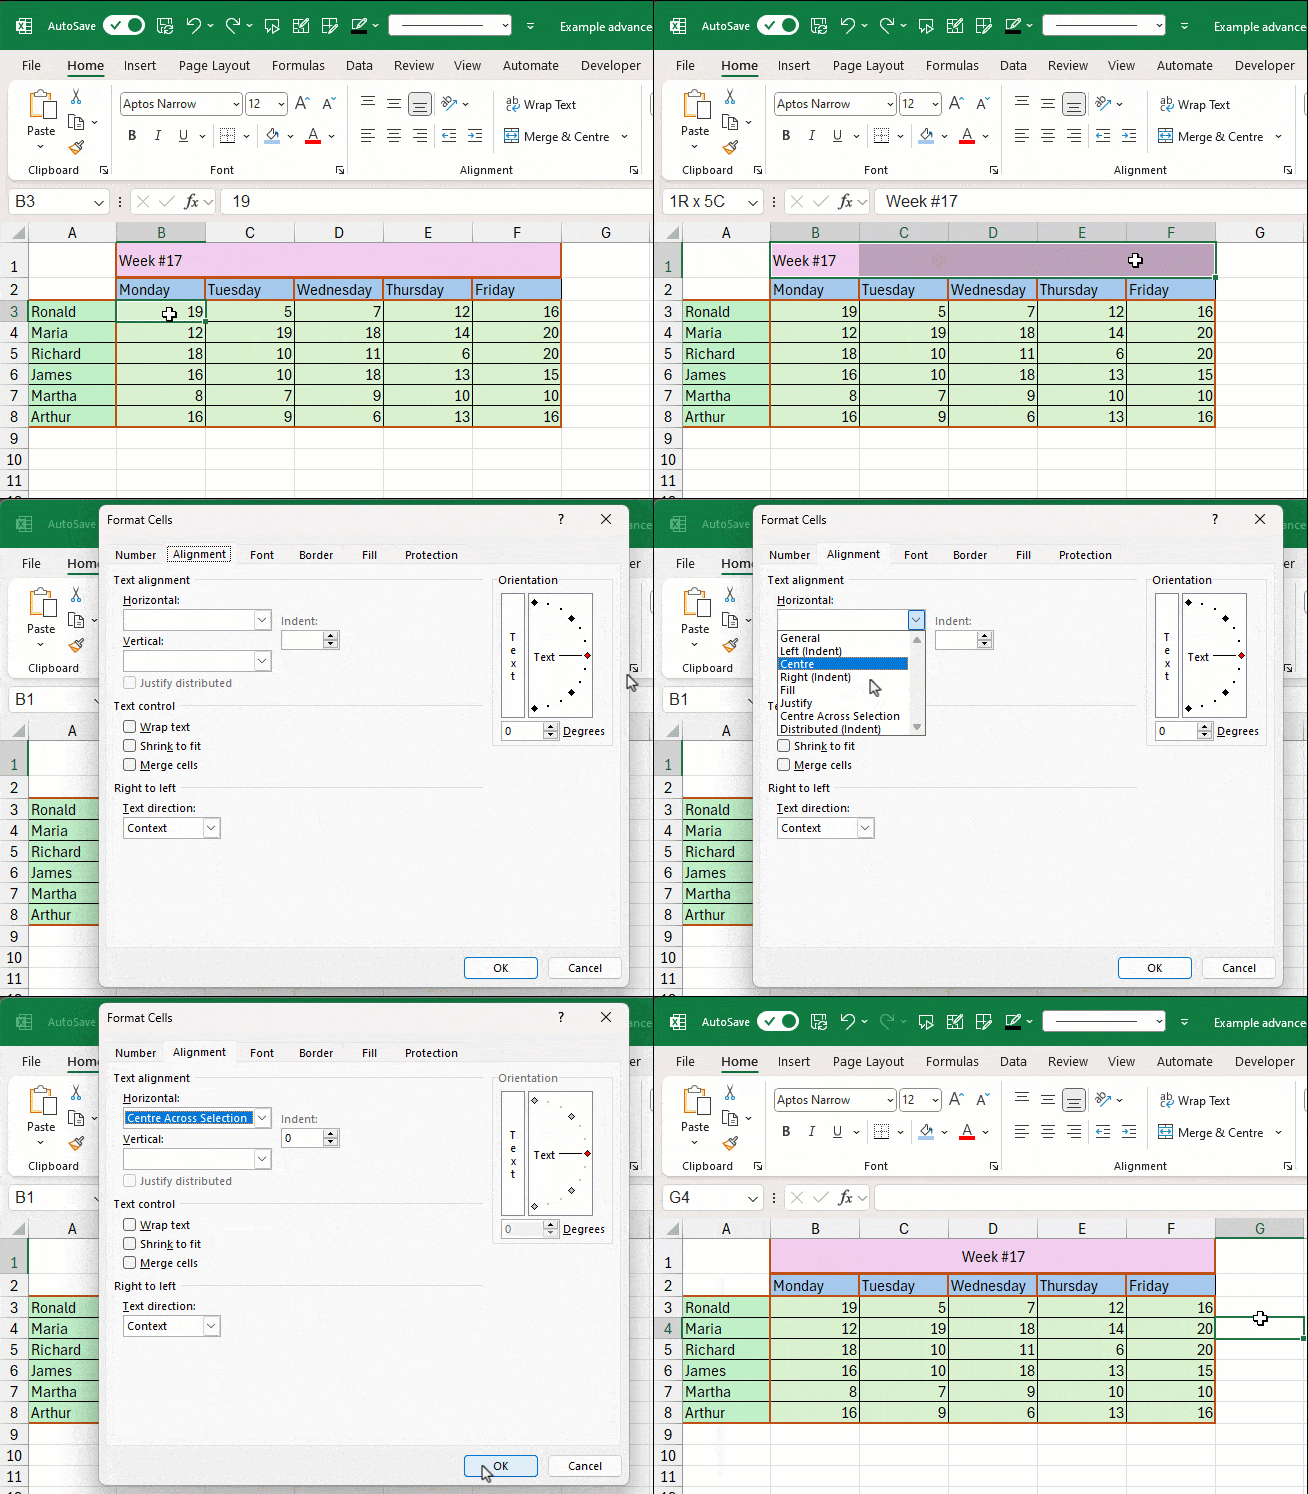
The best technique is to centre your text on several columns.
- Select your range of cells
- Open the additional alignment options
- In the Horizontal alignment options, select Centre Across Selection
Wrap text
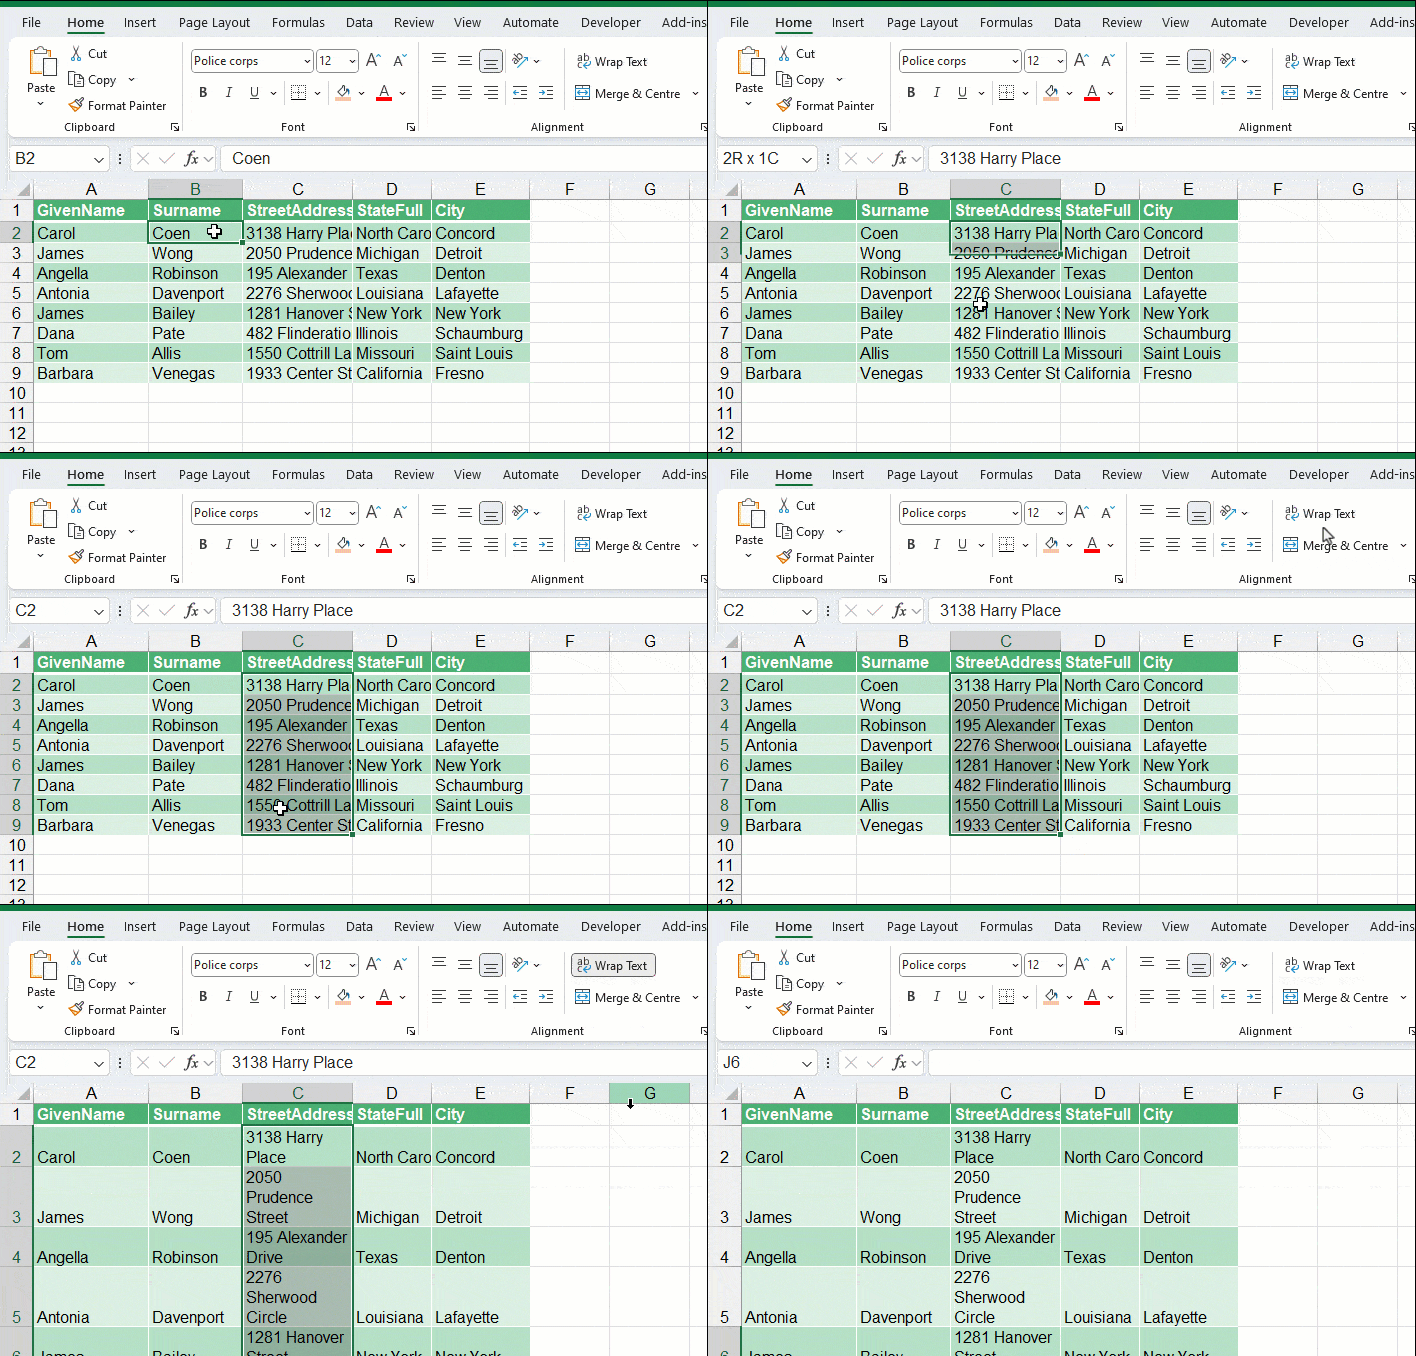
When the text in a cell is larger than the cell's width, the part that overlaps the other column is hidden.

But you can avoid this by applying the Automatic carriage return option to all the cells in your column:

Excel will automatically adapt the rows' height to the cells' content.
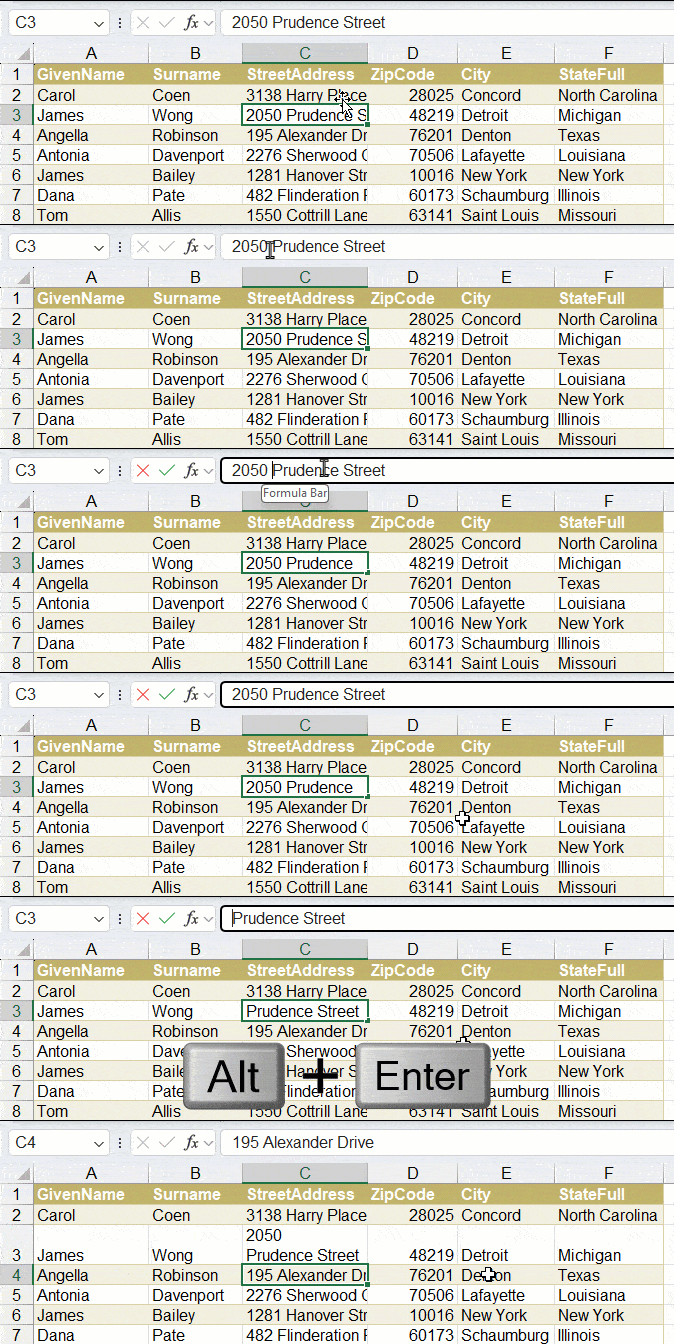
You can insert a manual carriage return in a cell with the shortcut Alt+Enter
Reset the horizontal alignment
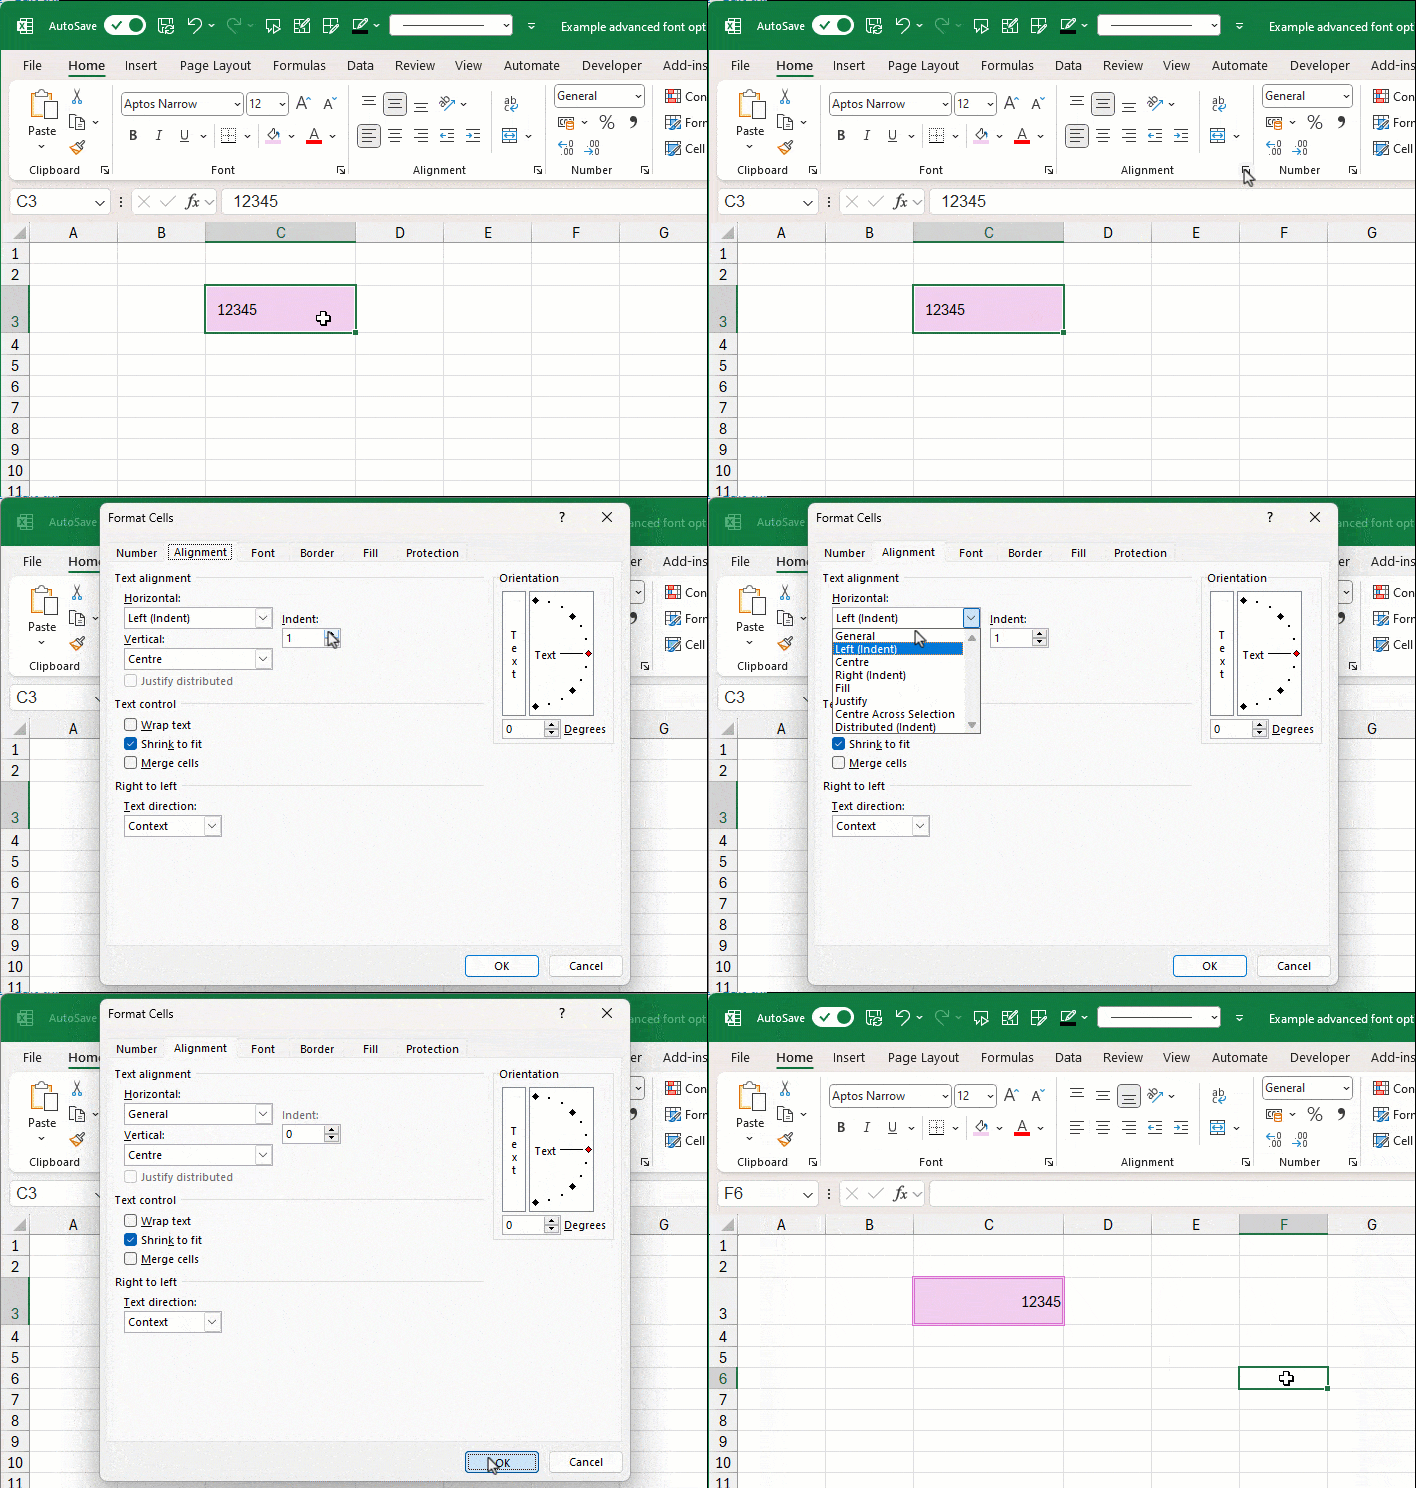
If you have applied a large number of alignment options (left, centre, etc.) or an indentation, there is a simple way to return to a situation without any alignment options.
- Select the cell to be cleaned of all horizontal alignment options
- Open the advanced alignment options
- Select the General option
You now have all the alignment tips in hand: fonts and advanced styles, horizontal and vertical alignment, indents, wrapping and merging text, and resetting everything back to default when needed.
Continue learning
Keep building your Excel skills with the rest of this tutorial series:
- Tutorial - Excel keywords
- Tutorial - Adjusting the Size of rows and columns
- Tutorial - How to make calculations in Excel
- Tricks to Insert, Delete, Hide Rows and Columns
- Tutorial - All Excel tricks to Copy-Paste
- Tutorial - Moving cells or columns with the mouse
- Tutorial - The Numbers Format
- Learn the secrets of Sorting Data with Excel
- Excel Tutorial - Filtering your data
- Manipulate Text in Excel without formula
- Excel Tutorial - Creating a dropdown menu
- Learn how to use the SUM function in Excel
- Tutorial for the Excel Functions AVERAGE, MIN, and MAX
- Learn how to use the Dollars in an Excel formula


